Notification emails
You can configure the following for the notification emails sent automatically to shoppers as the delivery status changes.
Edit the templates
Go to Settings > Customer notifications > Templates > Tracking
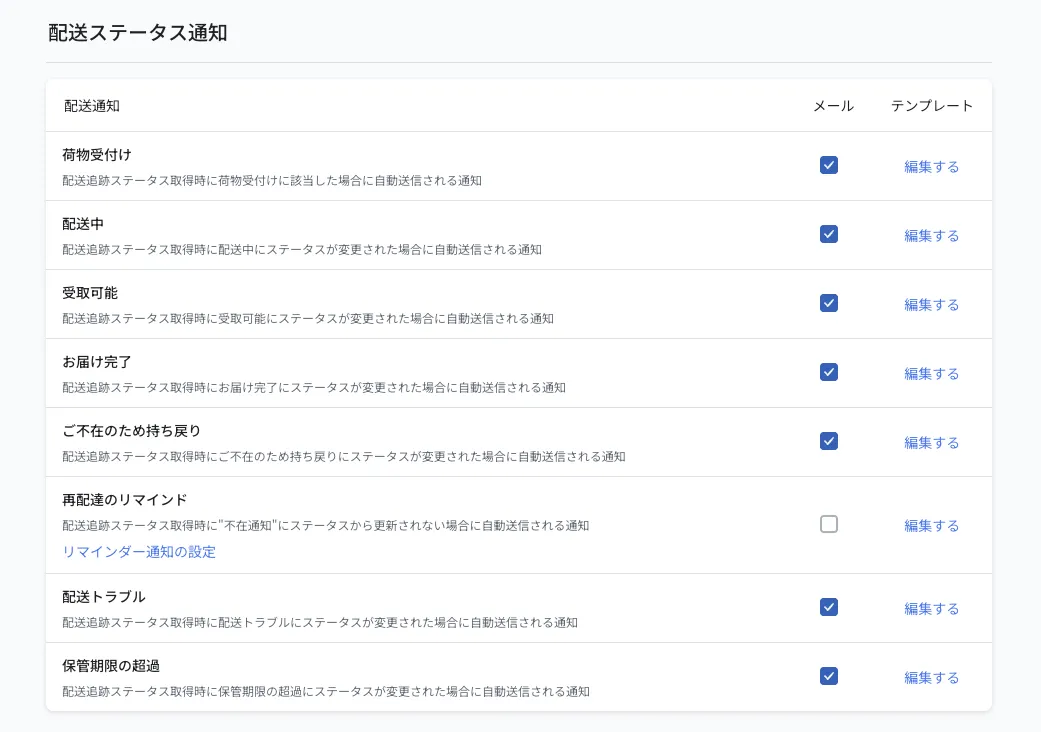
Click Edit on a notification to preview and edit the email content
※Each email comes with a default text and can be used as is. Customize the text freely if you want to change it
Check whether similar notification emails (such as shipping confirmation emails) are already sent from another system such as Shopify
If they are, turn off the corresponding notifications so shoppers do not receive duplicates
Set the sender email address
Set the sender (From) email address of the notification emails. With a sender address configured, you can see shoppers' replies to the notification emails sent from Recustomer.
Go to Settings > Customer notifications > Email sender > Tracking
Set the sender name
Enter the new email address in the sender email address field and click Authenticate
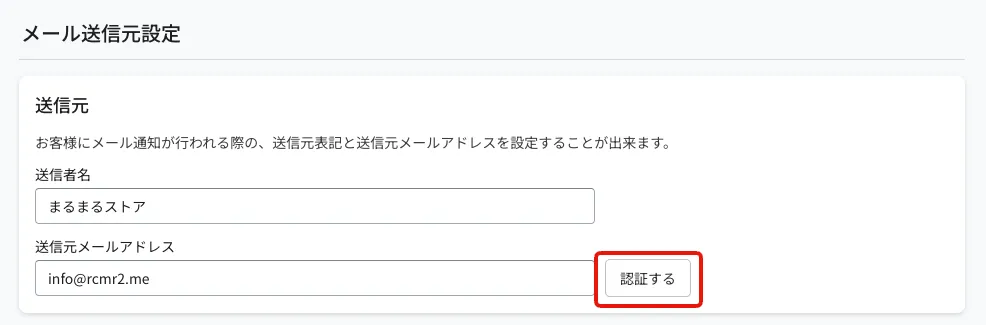
The "Verify domain" popup appears; add the displayed records to the DNS records of your domain
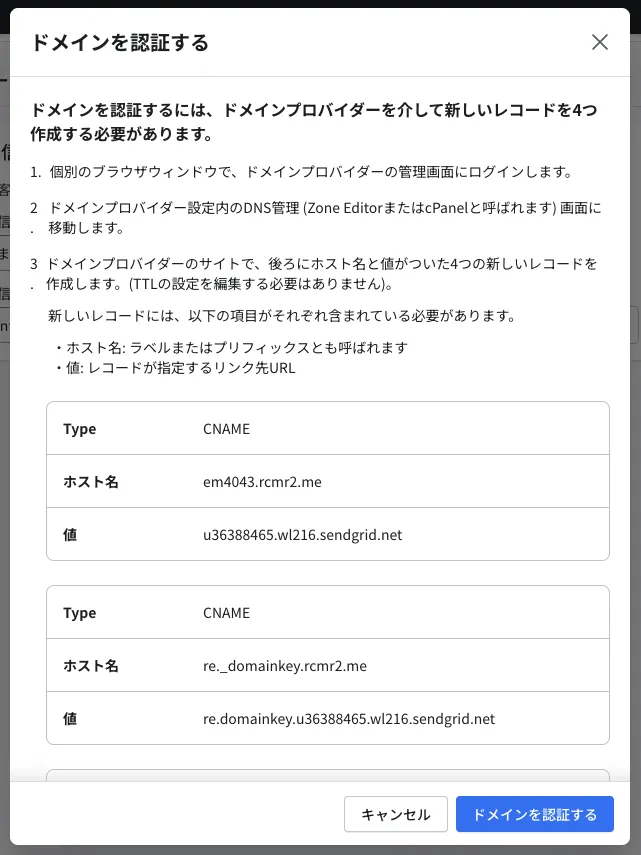
After the DNS setup is done, open the popup from step 4 again and click Verify domain
See the following guides for changing DNS records with major domain providers (in Japanese)